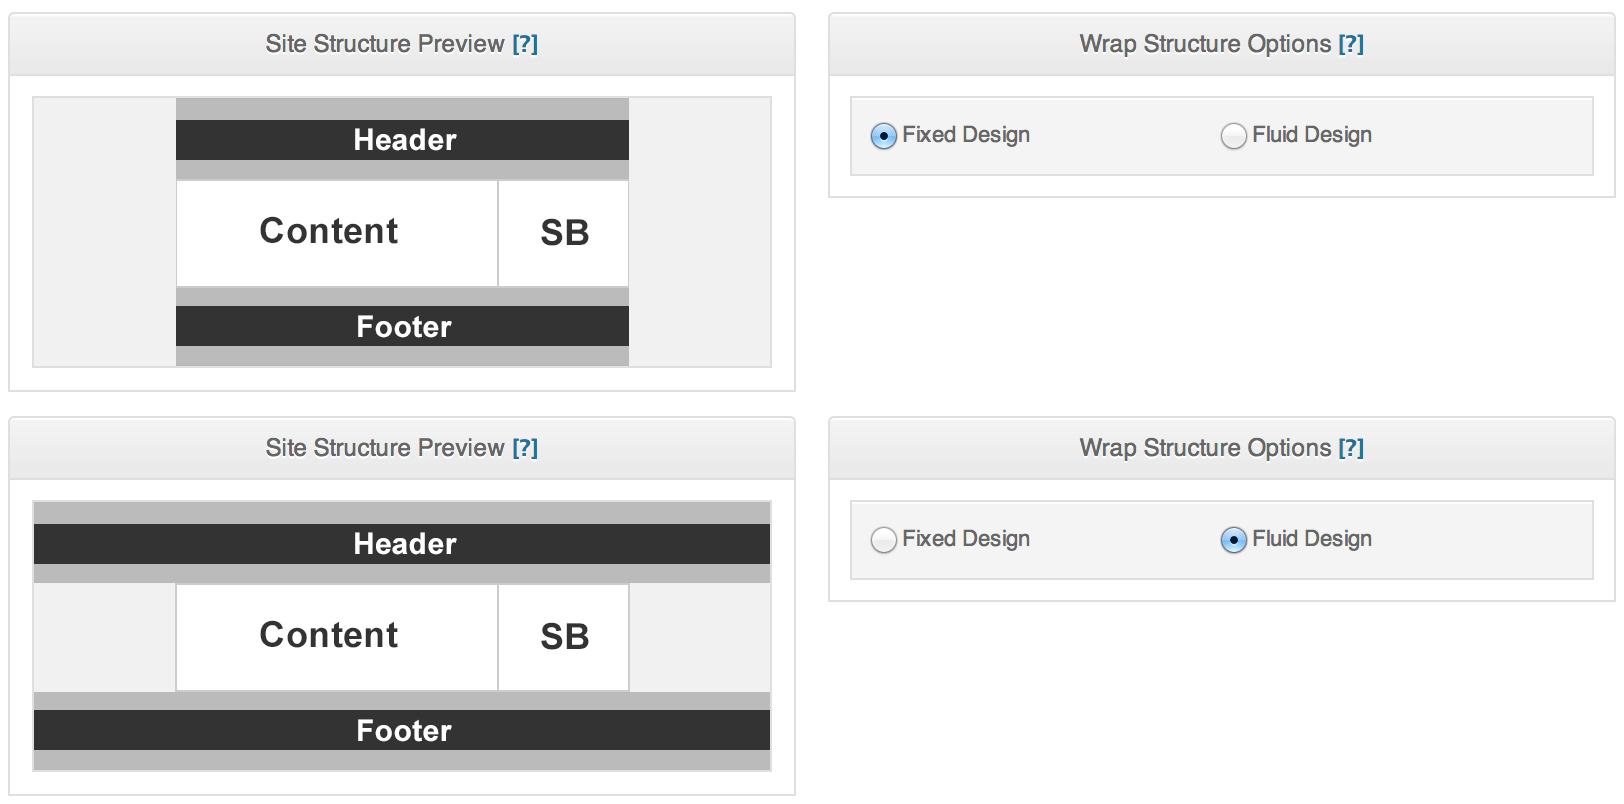
Dynamik Website Builder provides a simple solution for making your entire Genesis website either “fixed” or “fluid” as you can see by the screenshot below.

But there are some instances where you need a little more fine tuned control over which elements remain fixed and which become fluid. In such cases I’ve provided a simple solution that requires only a bit of copy/paste coding to get the job done.
First, let me note that there are two common hook locations for both the Primary and Secondary Menus (i.e.. above the Header and below the Header). Depending on which location your theme hooks in your menus you’ll want to use that particular code snippet when moving that menu to make it fluid. So take note of the specified location (above or below Header) given in the code snippet titles when choosing which to copy and paste.
Please note that the code provided should be copy/pasted into your Child Theme’s functions.php file or if you’re using Dynamik Website Builder or the Genesis Extender Plugin you should paste it into your Dynamik/Extender Custom > Custom Functions textarea.
Also note that depending on the Child Theme this may only move the elements, but not actually make them fluid in their design. This all depends on the Child Theme’s specific CSS code. In cases where this doesn’t produce the desired result some Custom CSS code may be required.
Header Fluid Only
To make it so your Header area “breaks out” of your main wrap and becomes fully fluid you should use the following code:
Primary Menu (Above Header) Fluid Only
To make it so your Primary Menu “breaks out” of your main wrap and becomes fully fluid you should use the following code:
Primary Menu (Below Header) Fluid Only
To make it so your Primary Menu “breaks out” of your main wrap and becomes fully fluid you should use the following code:
Secondary Menu (Above Header) Fluid Only
To make it so your Secondary Menu “breaks out” of your main wrap and becomes fully fluid you should use the following code:
Secondary Menu (Below Header) Fluid Only
To make it so your Secondary Menu “breaks out” of your main wrap and becomes fully fluid you should use the following code:
Footer Fluid Only
To make it so your Footer area “breaks out” of your main wrap and becomes fully fluid you should use the following code:
Footer & EZ Fat Footer Fluid Only
To make it so your Footer & EZ Fat Footer areas “breaks out” of your main wrap and becomes fully fluid you should use the following code (Note that this requires you to go to Dynamik Design > EZ > Fat Footer EZ-Widget Areas > “Fat Footer Display Position” and set that option to “Outside Inner Div”):
Combining Code Snippets
Now that you have all the various code snippets for the various Header, Footer and Menu elements you can combine them as needed to suit your specific needs.
So, for example, let’s say your Child Theme had a fixed Primary Menu (located above the Header), Header, Secondary Menu (located below the Header) and Footer and would like just the Primary Menu, Header, and Footer to be fluid, leaving the Secondary Menu in its fixed position. In this case you would combine the Primary Menu, Header, and Footer “Fluid Only” codes provided above and add them to your Custom Functions. This particular code snippet would look something like this:
Please note that if you want your Primary Menu, in this example, to remain above your Header after repositioned you will need to place the Primary Menu code above the Header code in your Custom Functions. You can also control the placement of these elements by way of Priority (explained in the above screencast), but for simplicity sake we’ll just use the physical code placement as our solution.
“Teaching A Man To Fish”
The above is a simple copy/paste solution that covers the majority of the possible scenarios, but I think it’s important to explain a bit about what we’re doing here so you can go away with more than just a code snippet.
What we’re doing in each of these cases is simply removing the element (i.e.. Header, Primary Menu, Secondary Menu, Footer) using the correct remove_action code and then adding it back in using the correct add_action code that hooks into either the genesis_before() or genesis_after() hook location (before = above site-container | after = below site-container).
So you can use these code snippets as they are, but you can also tweak what I’ve provided to make them work for your specific situation and needs. And note that you can also do this kind of add/remove_action stuff to move around other Genesis elements as well. And to help with this process you can either use the PHP Builder tool built into either Dynamik Website Builder or Genesis Extender Plugin or use the one we provide HERE.
Follow & Share: